Take a Coffee Break with Sage Timeslips
Last week, Desi Williams, our Sales Engineer for Sage Timeslips, presented five basic Sage Timeslips features in the first of our Coffee Break series:
- 1. Slip Entry Window
2. Generating Slip Reports
3. Pre-Bill Worksheet
4. Generate bill
5. Apply a payment

Desi taught us not just how each of these functions work, but also how you can customize each of them to make them work perfectly for you. You can watch the entire event in about half an hour – just like a coffee break – HERE, though you will need to order your own coffee (sorry, we’re still working on the delivery method for that). But just in case you don’t have the time for a break, we’ll give you the summary now.
1. Slip Entry Window

You have the option to automatically start the timer for every slip entry form and set the default for the start date as well – both of which will make sure that you can capture each second of every task and work efficiently. Desi also showed us the many other personal preferences selectors. Finally, once you have your slip set up and filled in to your liking, you can use the copy slip field to copy over to your new slip the timekeeper, the client, and the date.
2. Generating Slip Reports

Desi covered our most-utilized reports, starting with the slip listing report, that has a long list of reportable fields so that you can pull any information you need out of the database – and sort it exactly how you need to see it. You can even set the sort options by timekeeper, or by billable vs non-billable, and more - and filter for relative dates, client, slip classification and other fields.
3. Pre-Bill Worksheet
Pre-bill worksheets give you the opportunity to review everything on the bill before it goes out. You can also see what information is on hold. All of the Sage Timeslips common sort and report options apply here as well.
4. Generate bill
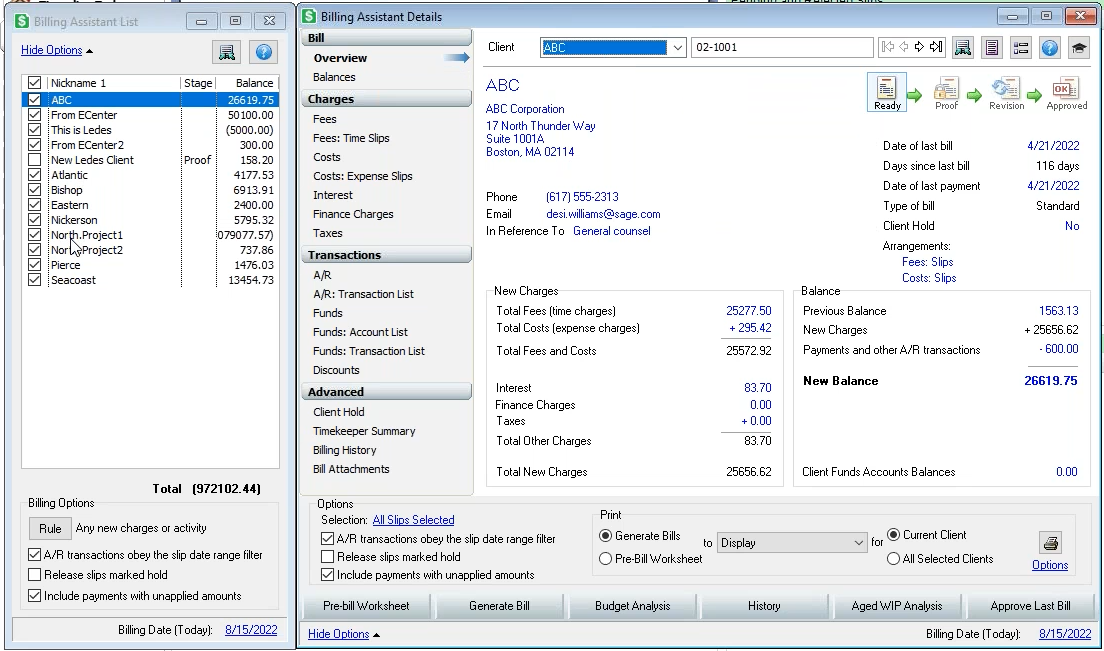
Desi showed us how to generate bills directly and, in the alternative, using the billing assistant to obtain “one-stop-shop” assistance in doing so.
You can also do Quick Bills on the fly for a one-time client or someone who just walked through the door, with up to ten time or expense entries.
5. Apply a payment

Last, but not least – because we all need to get paid – you have many options on how to apply payments. You can apply a payment to a specific invoice or apply it to all invoices. You also have many options to transfer money to pay other projects.
Please be sure to tune in for our next Coffee Break event on September 14th at 1pm EDT/10am PDT, where Desi will be speaking with Michael Simon, who lead our last webinar (you can view [HERE] if you missed it), to follow-up on some of these features – and some new ones too. You can register for it [HERE].
This content is advertising.